How to Turn On Airdrop on iPhone, Macbook, and iPad
Airdrop is one of the superior features on Apple devices, such as iPhones, Macbooks, or iPads. Through this feature, you can share files, videos, photos, and documents to other Apple users very quickly.
For other OS users who have just migrated to iOS, they are usually still confused about how to turn on Airdrop. In fact, you can activate it with quite easy steps.
How do you do it? Let's find the answer through this article. Read it until the end!
Also read:
How to Turn on Airdrop on iPhone

If you are using an iPhone, you can access the Airdrop feature in two ways, namely via the control center or the settings menu.
Here is the easiest way you can do to turn on Airdrop on iPhone via the control center:
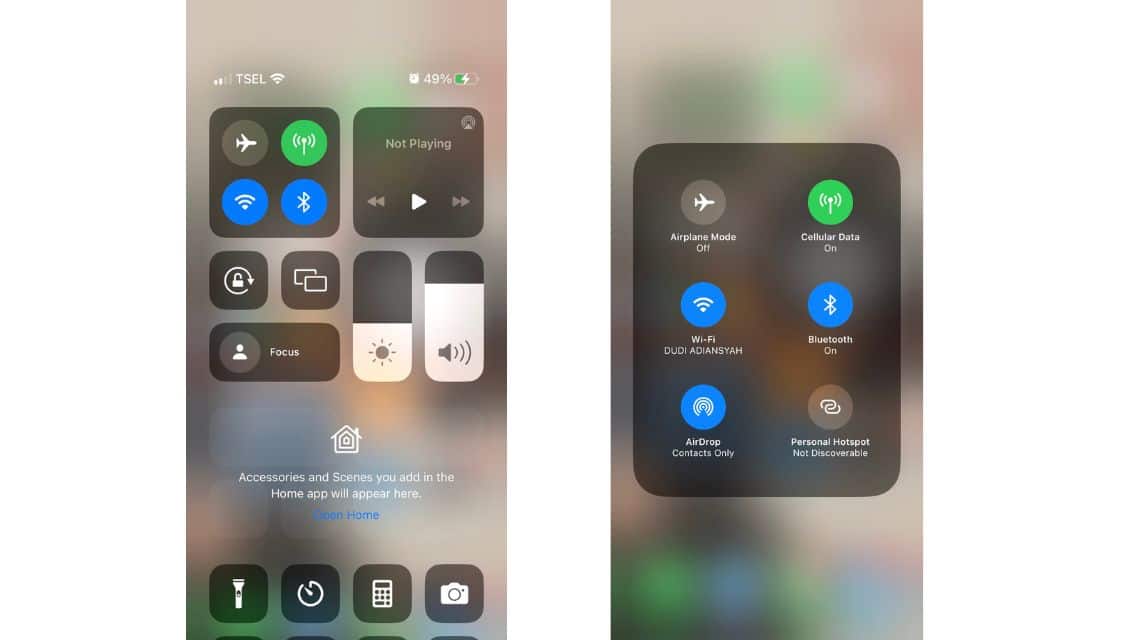
- On the home screen, you can “swipe down” at the top of the screen to access the “control center”;
- Hold for a few seconds the column containing the “airplane”, “Bluetooth”, “WiFi, and “network” icons;
- Select the “Airdrop” option in the bottom left corner;
- Select the “everyone for 10 minutes” option;
- Then your Airdrop profile will appear on other Apple devices so they can receive deliveries.
Meanwhile, you can also turn on Airdrop via the settings option by:
- Select the “settings” menu with the “geared” icon;
- Select “general”;
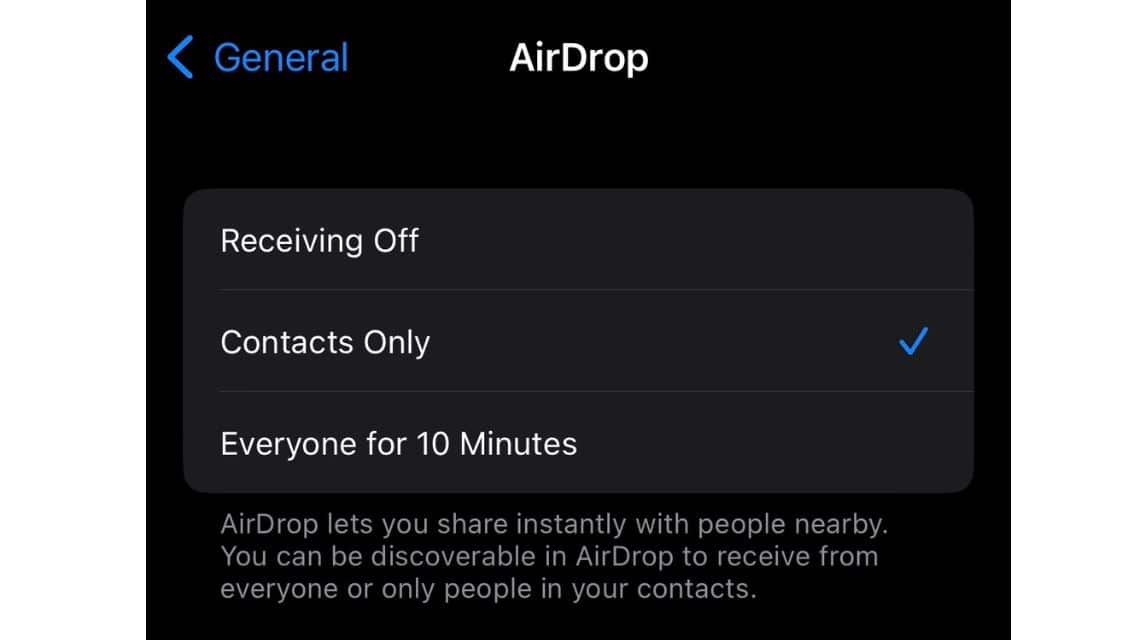
- Select the “Airdrop” option;
- Select “everyone for 10 minutes”
- Then your Airdrop is active to receive files from other devices.
Turning on Airdrop on Macbook

If you are a Macbook user, here are some easy steps you can take to turn on Airdrop:
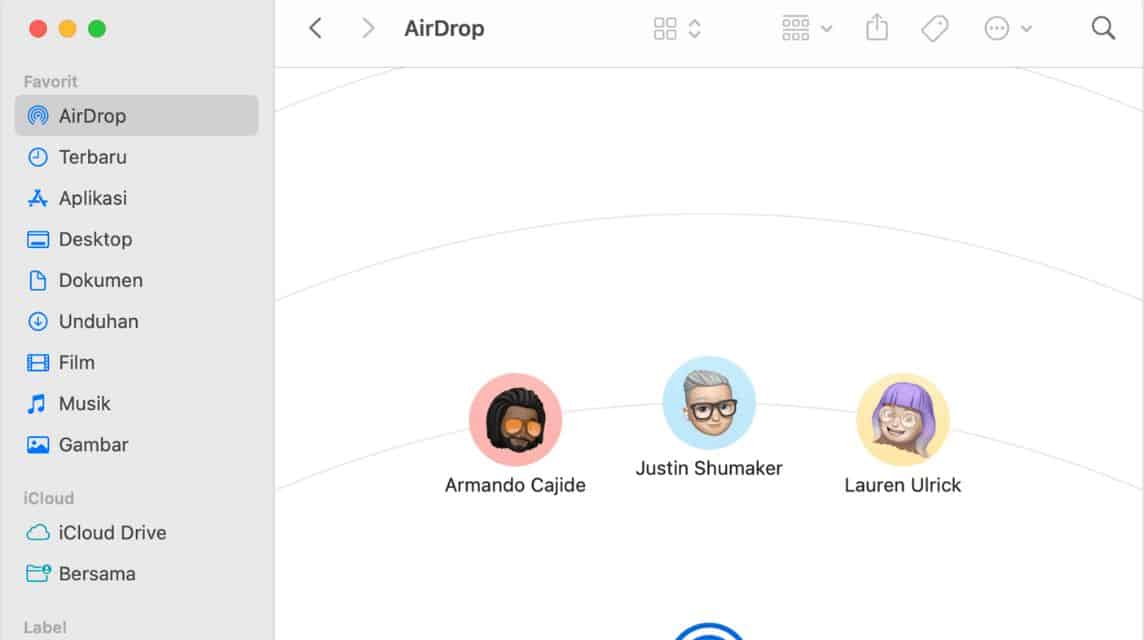
- In the main display, look for the “Finder” application which is usually located in the “dock”;
- Select the “Airdrop” option;
- Select “Allow me to be discovered by”;
- Select the “everyone” option to be discoverable by other Apple devices;
- Your Macbook can now receive files via Airdrop.
Turning on Airdrop on iPad

Actually, the way to turn on Airdrop on iPhone and iPad is the same. However, here are the complete steps via the control center:
- If you are using an iPad without a home button, swipe down from the top right corner of the screen. If you are using a home button, swipe up from the bottom of the screen;
- Press and hold the column containing the “WiFi”, “Bluetooth”, “network” icons;
- Tap the “Airdrop” icon;
- Select the “everyone for 10 minutes” option;
- Your iPad can now receive files via Airdrop.
Meanwhile, you can also do the same steps as the iPhone when turning on Airdrop via the settings menu. Here are the full details:
- In the main menu, select “settings” which has the “toothed” icon;
- Select “general”;
- Select “Airdrop”;
- Select the “everyone for 10 minutes” option
- Airdrop on your iPad is now active and can receive files.
Things to Watch Out for When Using Airdrop

Here are some things you need to pay attention to when using Airdrop on an iPhone, Macbook, or iPad:
Select Category according to your needs
In the Airdrop menu, there are three options, namely receiving off, contacts only, and everyone for 10 minutes.
If you have already sent files with friends who are already in your contacts, the “contact only” option can be the right choice. Because, sending files can be safer without having to worry about the wrong sending incident.
Meanwhile, the “everyone for 10 minutes” option can be another alternative for sending files via Airdrop.
However, you need to pay attention to the name of your device profile that matches the one displayed in the sender's Airdrop.
Disable After Use
After using Airdrop, don't forget to turn it off again. In addition to saving battery, you can also avoid unknown deliveries.
Review Files Before Accepting
If you enable “everyone for 10 minutes” mode, be sure to preview the file you are about to receive. If it is a photo, Airdrop will show you a preview of the photo that you can see before accepting it.
Also read:
These are some ways to turn on Airdrop on various devices. apples, such as iPhone, Macbook, and also iPad. That way, you can share files quickly to other Apple devices.
Come shop for digital products at the cheapest and fastest prices only at VCGamers Marketplace!


